
 Slovenian
 English
 German
 Spanish
 Italian
 Russian
 Arabic
 Korean
 Japanese
 French
 Dutch
 Danish
 Norwegian
 Portuguese
 Turkish
 Czech
 Lithuanian
 Polish
What Happens When a Liquid Silicone Injection Molding Tool Moves to a New Factory?
Kazalo vsebine
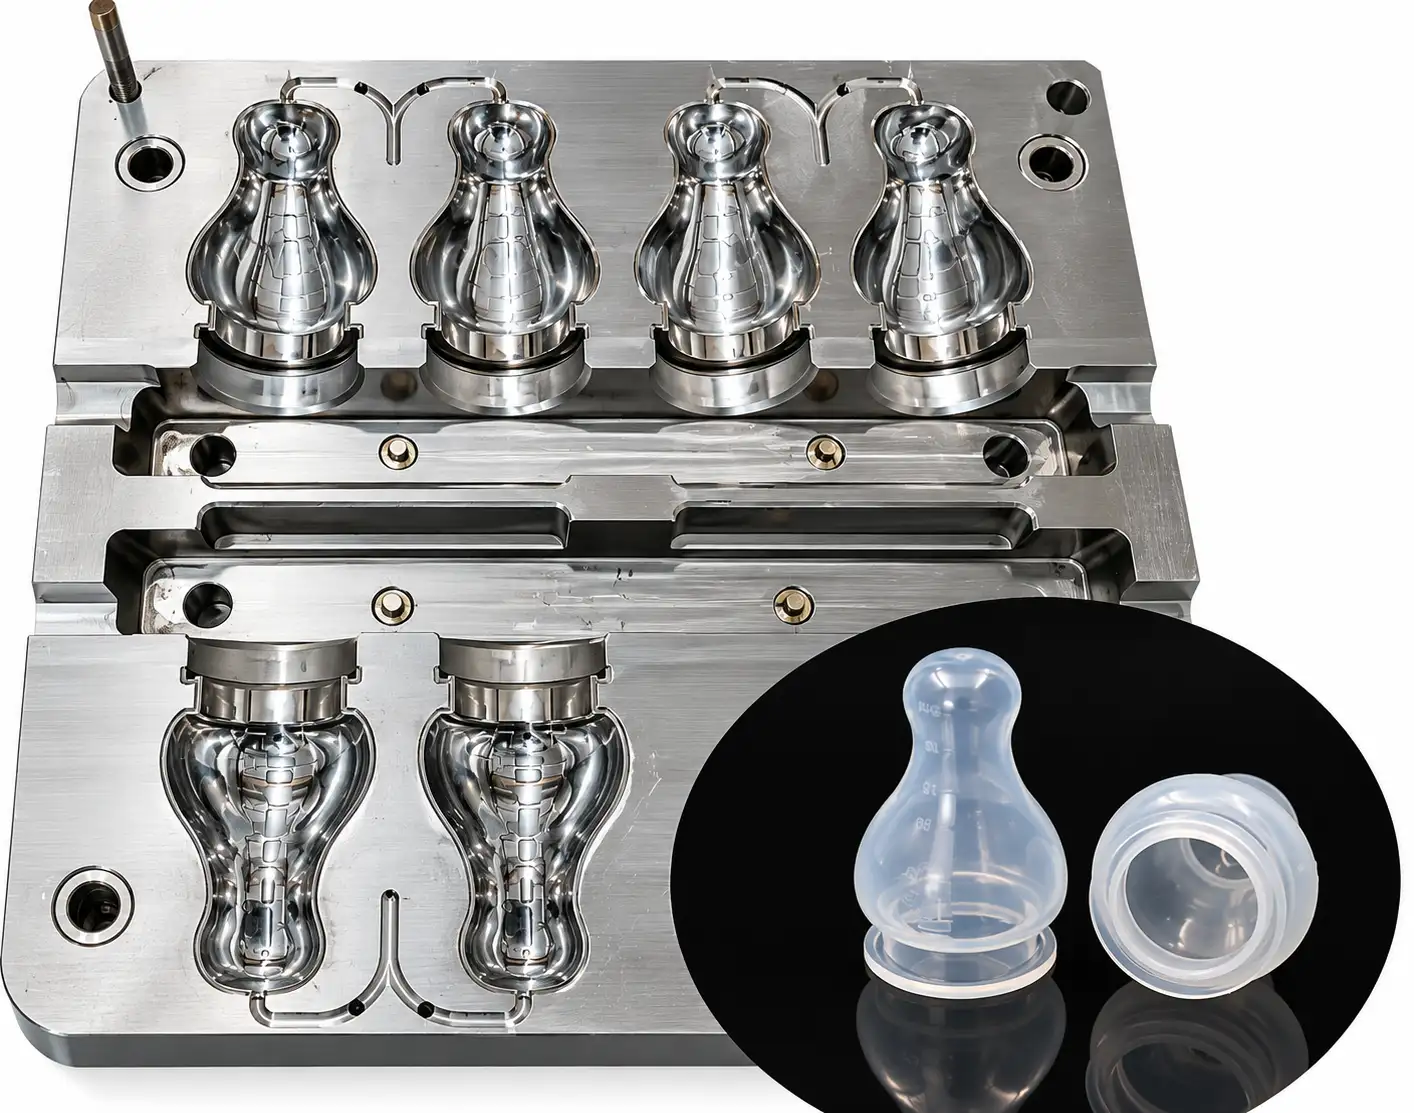
The mold looked fine when it came off the truck.
It had run clean at the previous supplier for two production cycles, according to the paperwork that came with it. No cracked cavities, no obvious rust, no missing inserts. The customer expected the first trial at the new factory to confirm the same result. Instead, the first few shots came out with flash along one edge of the parting line, thin enough to miss on a quick visual check but thick enough to fail a caliper measurement.
This is a common situation in Liquid Silicone Injection Molding, and it rarely has a single cause. A tool that ran well at one factory does not automatically run well at another, even when the steel hasn’t changed. Press tonnage, platen flatness, material batch, and operator loading habits all shift between facilities. The mold is only part of the process.
What Was Missing From the Transfer Package
The tool arrived with a mold drawing and a short process note. It did not come with a clamping pressure record, a cure time log, or a note on how the previous shop had been trimming material before loading it into the cavity.
That gap mattered.
Compression molding depends on the operator placing a pre-measured amount of silicone into an open cavity before the press closes. If the slug size, shape, or placement changes even slightly, the way material spreads across the cavity changes with it. The new factory’s team had reasonable process experience, but they were working from general knowledge of the Liquid Silicone Injection Molding process rather than the specific settings this tool had been running.
A mold transfer audit usually catches this before the first trial. Here, it didn’t happen, and the gap surfaced on the production floor instead.
Why the First Trial Produced Flash
The engineering review started with the obvious question: was the clamping pressure the same as before?
It wasn’t, not exactly. The new press ran slightly lower tonnage at the same nominal setting, a difference the team only found by checking the press calibration record against the mold’s rated closing force. Lower clamping pressure lets a small amount of material escape at the parting line before the mold fully seals, which is a straightforward explanation for flash appearing on one edge rather than uniformly around the part.
Material placement was checked next. The operators were loading slightly larger slugs than the previous shop had used, likely to compensate for what looked like short fill on early trial shots. Larger slugs meant more material had to be displaced as the press closed, which increased the load on the parting line right at the moment clamping pressure was already running lower than expected.
Two smaller issues stacked into one visible defect. Neither alone would have caused a rejectable part. Together, they did.
Povezani članki:

How the Tool Was Requalified
The fix wasn’t a new mold. It was a corrected process window.
The team adjusted the press to match the mold’s rated clamping force, then reduced slug size back toward the original spec once fill quality was rechecked at the correct pressure. A short run of parts came off clean, without the edge flash from the earlier trial. Dimensional checks on that batch confirmed the parting line was closing fully across the cavity, not just at the center.
The insert fit was also rechecked during this pass, since a worn insert can produce flash that looks similar to a clamping issue but requires a different fix. In this case the insert was within tolerance, which helped confirm the root cause was process-related rather than tooling wear.
Requalifying a transferred tool for LSR compression molding manufacturing usually means confirming three things line up: the mold’s rated clamping requirement, the actual press output, and the material loading method the operators are using. Any one of those drifting from spec can produce a defect that looks like a tooling problem on the surface.
What Buyers Should Request Before a Mold Transfer
A mold transfer is a good moment to ask for documentation that often doesn’t get requested until something goes wrong.
Useful records include:
- Clamping pressure and press tonnage used at the original facility
- Cure time and mold temperature settings
- Slug size or material charge weight, if compression molding is the process
- Insert condition notes and last maintenance date
- Dimensional inspection results from the most recent production run
None of this guarantees a defect-free first trial at a new supplier. It does narrow down where to look first if a problem shows up, instead of starting from a blank page.
Za custom LSR compression molding projects, tolerances and lsr compression molding flash control depend heavily on process settings that don’t always travel with the physical mold. A tool can move in a crate. The knowledge of how to run it correctly has to be rebuilt separately, ideally before the first production shot rather than after a customer flags a part.
Buyers evaluating a mold transfer should also confirm who is responsible for the lsr compression molding quality control plan at the new facility — first-article inspection, in-process checks, and what happens if early samples don’t match the original supplier’s parts.
LSR Compression Molding Tool Transfer
Find answers about mold transfer, press compatibility, process records, clamping pressure, cure settings, and the checks needed before a new supplier runs an existing LSR compression molding tool.
01
What should be reviewed before moving an LSR compression molding tool to a new supplier?
Request clamping pressure, cure time, mold temperature, and material charge records from the original supplier. Also ask for recent dimensional inspection data and insert condition notes. Without these, the new factory is essentially guessing at process settings, which increases the chance of defects like flash or short fill during the first trial run.
02
Why does a mold that ran well before suddenly produce flash after a transfer?
Flash after a transfer is usually a process mismatch, not a tooling defect. Differences in press clamping force, material slug size, or mold temperature between the two facilities can each contribute. Reviewing press calibration against the mold's rated closing force is often the first step in identifying the cause.
03
Can any LSR compression molding tool run correctly on any qualified press?
Not automatically. The mold has a rated clamping force and cure profile it was designed around. A press with lower output at the same nominal tonnage setting can still cause fill or flash issues, even if the press is otherwise suitable for silicone molding. Confirming actual press output against mold requirements is a necessary step during requalification.
04
What records should a customer receive when taking ownership of a mold?
At minimum, a customer should receive the mold drawing, material and process specification, cure time, clamping requirements, and the most recent first-article inspection report. Insert maintenance history is also useful, since insert wear can affect flash and dimensional accuracy over time.